A/C leaks usually do not announce themselves with a big puddle or an obviously broken part. Most of the time, cooling just slowly gets weaker, especially on hotter days or when you are sitting in traffic.
That slow change is why people end up topping off refrigerant more than once, even though refrigerant does not get used up.
When you find the leak early, the repair is usually simpler, and the A/C stays cold longer.
Why Dye Testing Works For A/C Leak Finding
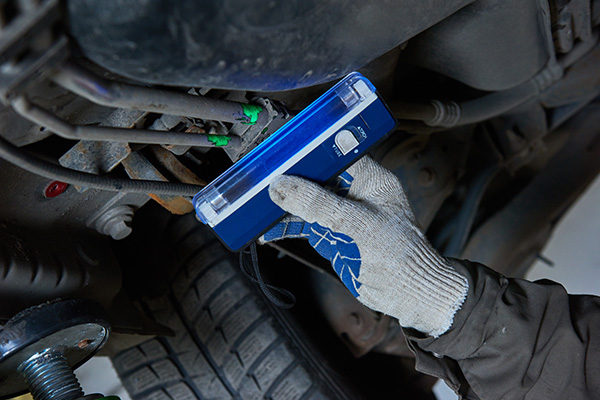
Dye testing works because most A/C leaks carry a little bit of refrigerant oil with them. A UV dye is added to the system, then the vehicle is run normally so the dye circulates with the oil.
If refrigerant escapes, the dye tends to leave a trace at the leak point. Under a UV light, that trace stands out clearly, even when the leak is too small to spot with the naked eye.
This approach is especially helpful for slow leaks that only show up under certain temperatures and pressures, which is common in real-world driving and regular maintenance schedules.
1. Service Port Valve Cores
Service ports are used for pressure checks and recharging, so they have a valve core that seals under pressure. Over time, that tiny core can seep, especially if the cap is missing or not sealing well.
A slow port leak can take months to show up as weak cooling. It is also easy to miss because the leak is small and the area does not always look wet or dirty.
With dye testing, the port area often glows first, making it clear whether the valve core or the cap seal is the issue.
2. O-Rings At Line Connections
A/C lines connect at multiple points using O-rings, and those O-rings live in a harsh environment. Heat cycles harden rubber, and vibration can slightly disturb sealing surfaces over time.
Even a tiny imperfection can allow refrigerant to seep out slowly. Many drivers notice the A/C takes longer to cool before they notice anything else.
Dye can collect right at the connection, helping confirm whether the leak is at the joint itself or coming from a nearby component and traveling along the line.
3. Condenser Damage From Road Debris
The condenser sits at the front of the vehicle, so it takes hits from rocks, sand, and road debris. It also addresses moisture and grime, which can corrode fins and narrow passages over time.
A small pinhole leak in the condenser can be hard to see, especially if the front end is dirty. Cooling first fades at idle because the system has less airflow to help when you are stopped.
Dye testing can reveal a bright trail on the condenser face or at a specific tube, which helps avoid replacing parts based on guesswork.
4. Compressor Shaft Seal Seepage
Compressors have a shaft seal that can seep as mileage climbs, especially if the system has run low on refrigerant before. A low charge can reduce oil circulation, and the seal area may dry out or wear more quickly.
This leak is tricky because it can look like general grime in the compressor area. Some vehicles also throw dust and moisture around that part of the engine bay, which hides evidence.
When dye is present, seepage near the front of the compressor usually becomes obvious. That helps confirm whether the leak is truly at the compressor or at a nearby hose connection.
5. Evaporator Leaks Inside The Dash
The evaporator sits inside the HVAC case under the dashboard, and it is one of the most frustrating leak locations because you cannot see it directly. Moisture and temperature swings inside the case can contribute to corrosion over time, especially in humid climates.
If the evaporator leaks, you may not see anything under the hood. Cooling just fades, and the system might start cycling more often because pressures are not staying where they should.
Dye can sometimes show up at the condensate drain, which is a strong clue that the leak is inside the case. In some situations, an electronic detector is used alongside dye to confirm the finding before recommending major disassembly.
What To Expect During A Proper A/C Leak Check
A proper leak check starts with confirming performance and system pressures, then choosing the best method to locate the leak. Dye testing is great for slow leaks, while electronic detection can help find leaks that have not left much residue yet.
After the leak is found and repaired, the system should be evacuated and recharged to the exact specification. Modern systems are sensitive, and the correct charge level is critical to cooling performance and compressor health.
If you are trying to avoid repeat issues, this is the moment to carefully inspect related seals and weak points to prevent the next leak from showing up a month later.
Get A/C Leak Testing in Seattle, WA with West Seattle Autoworks
At West Seattle Autoworks, we can add UV dye to your system, trace the leak to its source, fix it, and recharge the system correctly so your A/C cools the way it should.
If your cold air has been getting weaker or changing in traffic, schedule a visit so we can pinpoint the problem and explain the most practical fix based on what we find.
You will get clear answers and cold air again.